Cement Screeding Guide: How to Screed a Cement Floor for a Durable, Level Finish
Table of Contents
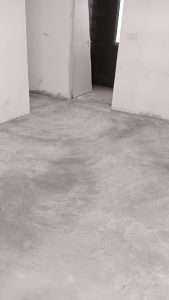
What Is Cement Screeding?
Why Use Cement Screeding?
Types / Approaches of Cement Screeding
Materials & Tools Needed
Step-by-Step Cement Screeding Process
Mix Ratios & Best Practices
Curing, Maintenance & Drying
Common Mistakes & How to Avoid Them
When to Use Alternative Screed Types
Frequently Asked Questions (FAQ)
Summary & Call to Action
1. What Is Cement Screeding and Why Does It Matter for Floor Levelling?
Definition: Cement screeding refers to applying a layer (a “screed”) of cementitious material (typically cement + sand + water, sometimes with additives) over a concrete base or structural slab. Its purpose is leveling, smoothing, and preparing for final floor finishes.
In construction, a “screed” can mean (a) the material itself, (b) the action of leveling, or (c) the tool used to level. Wikipedia+1
Cement screeding is usually non-structural; it’s a finish or intermediate layer, not the structural slab.
2. Why Use Cement Screeding?
Cement screeding offers the following advantages:
Creates a flat, level surface, essential for tiling, wood flooring, vinyl, etc.
Helps correct slight irregularities in the substrate.
Provides a stable base and better adhesion for the final finish.
Can protect embedded systems (like underfloor heating) and distribute loads.
Improves aesthetics and reduces localized stress or weak spots.
However, it’s not intended to carry major structural loads — that’s the role of the base concrete slab.

3. Types of Cement Floor Screeds (Bonded, Unbonded, Floating, and Self-Leveling)
When one says “cement screeding,” there are multiple subtypes or approaches. Choosing the right type is crucial. Common types include:
Screed Type Description / Use Case Bonded Screed Screed directly bonded to structural slab, often 20–50 mm thick. Unbonded Screed Screed laid over a damp-proof membrane (DPM), often with slip layers to allow movement. Floating Screed Screed over insulation or underfloor heating systems, isolated from base slab. Liquid / Flowing Screed (Self-leveling) Pre-mixed or pumpable screed that flows into place and levels itself. Fiber-reinforced or Polymer-modified Screed Additives or fibers help with crack control, adhesion, and flexibility.
4. Materials & Tools Needed
To carry out proper cement screeding, you’ll need:
Materials
Ordinary Portland Cement (OPC) or equivalent
Sharp / clean, well-graded sand (not fine building sand)
Water (clean, free of contaminants)
Optional additives: plasticizers, fibers, bonding agents, shrinkage reducers, waterproofing admixtures
(If over DPM) a slip / separation layer
Tools & Equipment
Straightedge / screed board / aluminium batten
Screed rails or battens (for level guidance)
Trowels, floats
Mixing equipment (wheelbarrow, mechanical mixer, paddle mixer)
Screed pump (for pumped / flowing screeds)
Laser level, spirit level, or leveling line
Primer / bonding agent brush or roller
Protective sheeting / curing membranes
Moisture meter (to check dryness before finishing)
Also, plan safety gear (gloves, goggles, masks) because cement dust is hazardous.
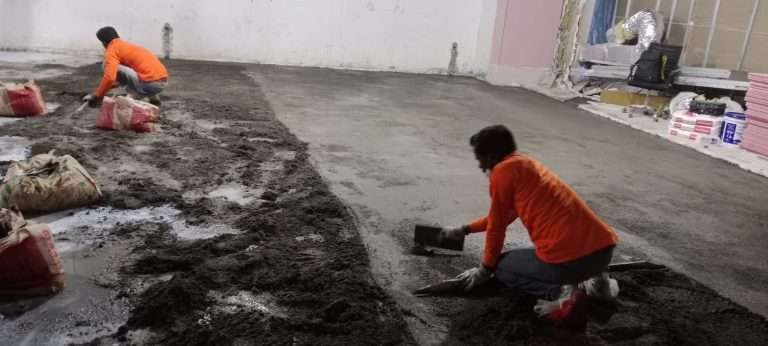
5. Step-by-Step Screeding Floor Process
Before applying a cement screed, make sure the concrete substrate is well-prepared. The base must be fully cured, stable, and free from visible cracks or movement. Clean the surface thoroughly by removing dust, grease, debris, or laitance. Check for moisture — if the substrate is too dry or porous, dampen it slightly or use a primer. For a bonded cement screeding system, apply a bonding slurry or adhesive to ensure proper adhesion between the screed and the base.
Set Up Screed Guides / Rails
Install screed rails or battens according to the required thickness and final level of the screed floor. Use a laser or spirit level to verify accuracy, as this step directly affects the final smoothness and evenness of the cement floor screed.
Prepare / Mix Screed Material
Mix the screed using the correct proportions of cement, sand, water, and any additives. The mix should be semi-dry but workable, suitable for screeding both small and large areas. For flowing or self-leveling screeds, always follow the manufacturer’s instructions to maintain consistency and strength.
Apply Screed
Start pouring or placing the mix from one end of the area and move systematically across the floor. Use a straightedge or screed board to level the material over the guide rails. Compact the screed gently to remove air pockets, and strike off any excess to achieve a consistent level throughout the cement screed floor.
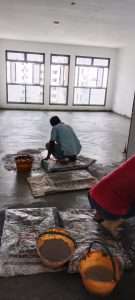
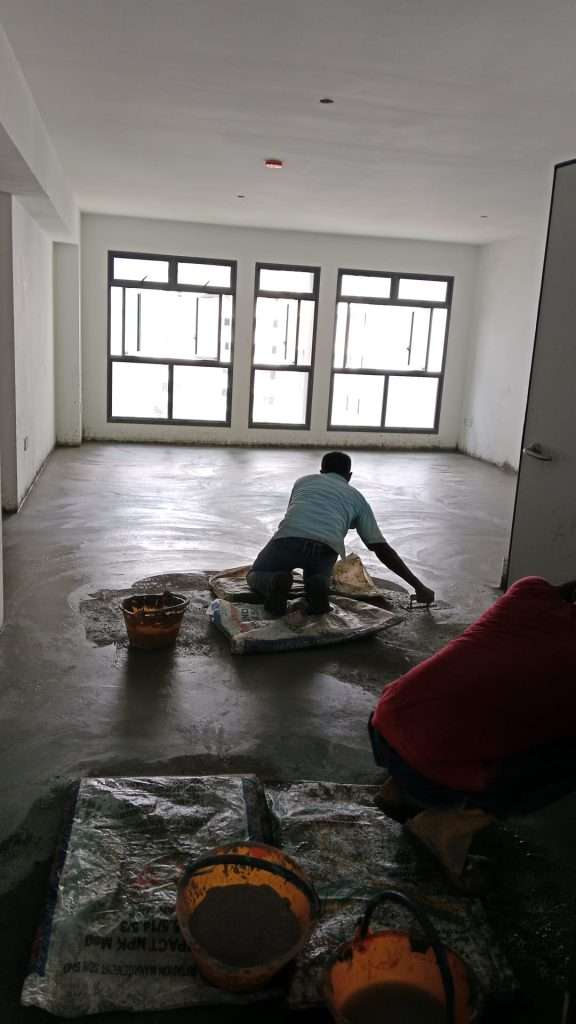
Fine Finishing / Floating
Once leveled, use a float or trowel to smooth the surface and fill minor imperfections. Avoid excessive troweling, which can lead to surface segregation or weak spots in the cement floor screed.
Edge / Joint Treatment
Insert control or expansion joints as needed, particularly on larger screed floors, to reduce cracking. Remove rails or formwork carefully once the screed has begun to set, ensuring the edges remain intact.
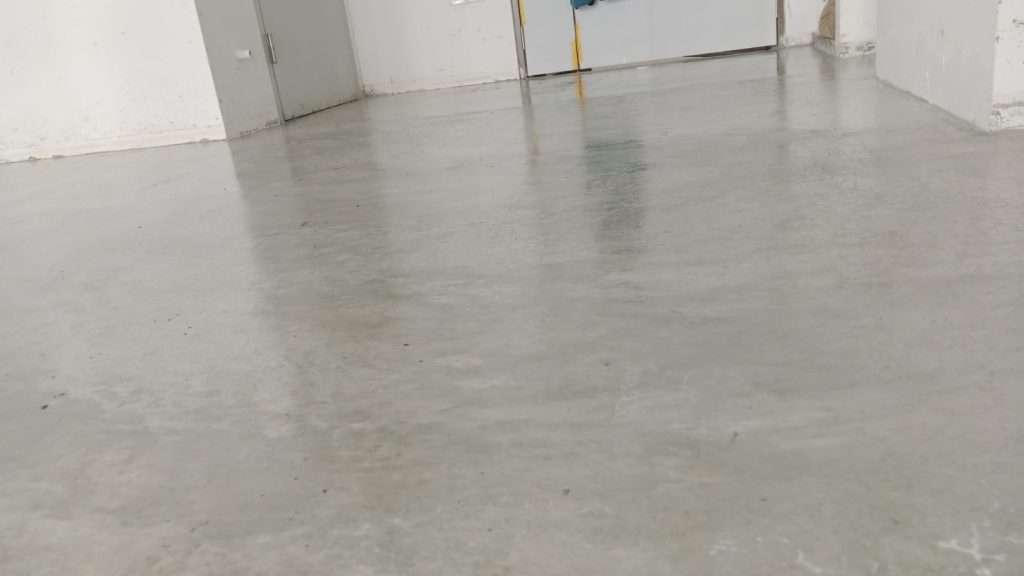
Curing / Protection
After finishing, cover the surface immediately with curing membranes or plastic sheets to retain moisture. Proper curing — usually between 7 and 28 days — ensures the cement screed develops its full strength. Protect the surface from rapid drying, direct sunlight, wind, or frost.
Care Before Final Finish
Before applying any final floor finishes, confirm that the cement screed floor has reached an acceptable moisture level using a moisture meter. If needed, apply primers or leveling compounds to achieve a perfectly smooth finish ready for tiling, vinyl, or other flooring systems.
6. Step-by-Step Method for Cement Screeding and Screed Floor Installation
Substrate Preparation
Before applying a cement screed, make sure the concrete substrate is well-prepared. The base must be fully cured, stable, and free from visible cracks or movement. Clean the surface thoroughly by removing dust, grease, debris, or laitance. Check for moisture — if the substrate is too dry or porous, dampen it slightly or use a primer. For a bonded cement screeding system, apply a bonding slurry or adhesive to ensure proper adhesion between the screed and the base.
Set Up Screed Guides / Rails
Install screed rails or battens according to the required thickness and final level of the screed floor. Use a laser or spirit level to verify accuracy, as this step directly affects the final smoothness and evenness of the cement floor screed.
Prepare / Mix Screed Material
Mix the screed using the correct proportions of cement, sand, water, and any additives. The mix should be semi-dry but workable, suitable for screeding both small and large areas. For flowing or self-leveling screeds, always follow the manufacturer’s instructions to maintain consistency and strength.
Apply Screed
Start pouring or placing the mix from one end of the area and move systematically across the floor. Use a straightedge or screed board to level the material over the guide rails. Compact the screed gently to remove air pockets, and strike off any excess to achieve a consistent level throughout the cement screed floor.
Fine Finishing / Floating
Once leveled, use a float or trowel to smooth the surface and fill minor imperfections. Avoid excessive troweling, which can lead to surface segregation or weak spots in the cement floor screed.
Edge / Joint Treatment
Insert control or expansion joints as needed, particularly on larger screed floors, to reduce cracking. Remove rails or formwork carefully once the screed has begun to set, ensuring the edges remain intact.
Curing / Protection
After finishing, cover the surface immediately with curing membranes or plastic sheets to retain moisture. Proper curing — usually between 7 and 28 days — ensures the cement screed develops its full strength. Protect the surface from rapid drying, direct sunlight, wind, or frost.
Care Before Final Finish
Before applying any final floor finishes, confirm that the cement screed floor has reached an acceptable moisture level using a moisture meter. If needed, apply primers or leveling compounds to achieve a perfectly smooth finish ready for tiling, vinyl, or other flooring systems.
7. Curing Process for Cement Screeding and Screed Floor Durability
-
Curing is one of the most crucial stages in cement screeding, often just as important as the mixing and laying process itself. Proper curing ensures the cement floor screed achieves maximum strength and durability while preventing common issues like shrinkage, cracking, or surface dusting.
To maintain moisture and promote even curing, cover the screed floor with wet burlap, plastic sheeting, or apply curing compounds. Gentle misting can also help, especially in dry or hot conditions. Protect the surface from direct sunlight, strong winds, or sudden temperature changes that could cause premature drying and weaken the cement screed floor.
Curing usually happens in stages: the floor may handle light foot traffic after 1–2 days, but full structural strength typically develops over 28 days, depending on the mix design and site conditions. Before applying any final finishes, always check the residual moisture levels — if the cement screeding retains too much moisture, adhesives or finishing materials may not bond properly and could fail over time.
8. Common Mistakes & How to Avoid Them
| Mistake | Consequence | Preventive Step |
|---|---|---|
| Overwatering mix | Weak screed, cracking, shrinkage | Measure water carefully; use plasticizers if needed |
| Poor substrate prep / bonding | Delamination or bonding failure | Clean, prime, dampen substrate as needed |
| No joints in large areas | Random cracks | Plan expansion / control joints |
| Overworking or re-troweling late | Segregation, surface defects | Finish at proper time; don’t delay floating too long |
| Too rapid drying | Shrinkage cracks, dusting | Cure properly, cover, control environment |
| Installing finish before drying | Adhesive / tile failure | Always test moisture content before finishing |
9. When to Use Alternative Screed Types
While traditional cement screeding and the standard cement floor screed perform exceptionally well for most flooring projects, certain situations call for alternative screed types that better match specific site or performance needs.
Flowing or self-leveling screed is ideal when speed, flatness, and efficiency are the main priorities — especially for large commercial screed floor areas or installations with underfloor heating systems. These screeds spread easily and create a perfectly level finish with minimal manual work.
For high-traffic zones or heavy-load applications, fiber-reinforced or polymer-modified screeds provide enhanced strength, flexibility, and crack resistance compared to a standard cement screed.
In interior spaces with limited thickness or where quick installation is required, liquid or gypsum-based screeds can be an excellent alternative. However, these options are often more moisture-sensitive and may not be suitable for wet or outdoor conditions.
In some modern design projects, the screed itself becomes part of the final aesthetic. A polished cement screed floor, once sealed and finished, can deliver a sleek, contemporary look that doubles as the final surface layer.
No matter the type, always follow manufacturer recommendations and consider environmental factors such as climate, moisture exposure, and expected loads before selecting the right screeding method for your project.
Frequently Asked Questions (FAQ)
Q: How thick should my cement screed be?
A: It depends on type: bonded screed may be 20–50 mm; floating or insulation-overlaid screeds often 50–70 mm or more, depending on load and system.
Q: Can I use cement screed over an existing uneven concrete slab?
A: Yes, as long as the slab is sound and stable. Clean it, prime or bond, then apply screed to level it.
Q: When can I walk on the screed?
A: Light foot traffic is often possible after 24–48 hours, but full curing (and load-bearing) takes longer (often up to 28 days, or per mix specification).
Q: Is cement screed waterproof?
A: Not inherently. Use waterproofing admixtures, sealers, or membranes if moisture protection is needed. Ecoform Europe – Worldwide
Q: Can I leave the screed exposed as a floor finish?
A: Yes, with proper polishing, sealing, or surface treatment, screed can be the final visible floor. nextlevelufhs.co.uk
11. Summary & Call to Action
Cement screeding is a foundational skill for constructing quality floors. Done right, it delivers level, stable, durable surfaces ready for final finish. Done poorly, it leads to cracks, failures, or wasted material.
At BD Networks PTE Ltd, we specialize in precision execution of cement screeding projects — from small residential jobs to large commercial floors. If you’re planning a project and want expert guidance or execution, contact us today for a consultation and quote.